Project GT Junior
continued...

Front floor section is marked up for drilling and punching. Again, this work is carried out from below with panel clamped in final position.
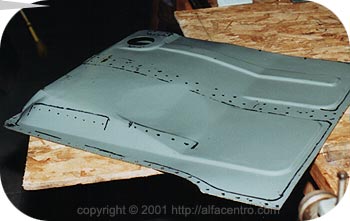
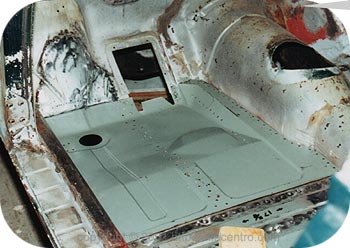
Front floor is fitted into place. Overall, fit of these OEM-style replacement panels is very good.
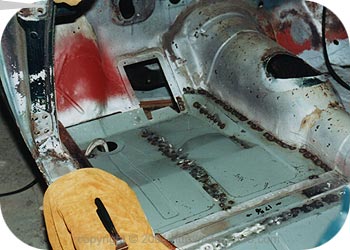
Rosette welded in place. C-clamp in drain hole closes gap between pan and front jack point. Eventually seam between front and rear sections will be finished with a bead (actually a series of short beads).
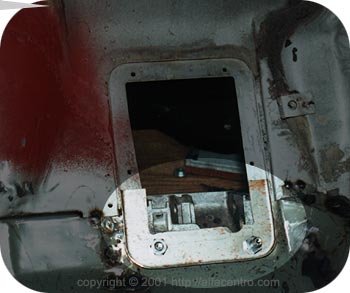
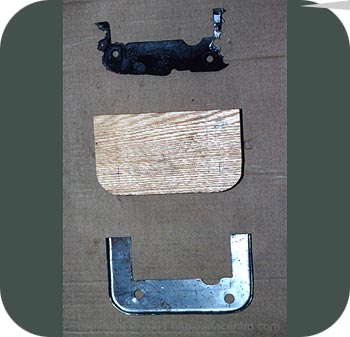
Opening for pedals had heavy gauge reinforcement; lower portion was rotten (relic at top of photo). New lower section fabricated from 16 gauge steel. Lip was formed by clamping workpiece to oak form (center) and beating the edges.
Pedal carrier is temporarily bolted in place and used to align and fit the patch. Patch deliberately made with some extra material at the top so that it could be trimmed to fit.

Note that opening is not quite square; this is correct.

Welded in place. All that's left is to weld the nuts to the plate, do a little grinding, and paint. For more on the pedal box cover, see Julia Sue's article on fabricating these.

Click here for Part 3: fun, fun, fun rebuilding the inner rockers!

Continued... p8 p9 p10 p11 p12 p13 p14

part 3

back to part 1

Questions? Comments?

Copyright © 2001 AlfaCentro & Forza Modern Media. All rights reserved. Neither AlfaCentro.com, it's publisher, FORZA Modern Media, LLC., or the individual article authors makes any warranties, expressed or implied, that the techniques, modifications, and procedures outlined in these stories are free of errors and omissions, meet applicable safety standards, or are suitable for the purposes described. The publisher and authors also expressly disclaim all liability for damages that may arise from the use of information presented in these articles.

alfacentrofeaturestech q&aresourcesclassifiedsabout usannounce list