Project GT Junior
continued...

The original 105 floor stamping had a horizontal lip on the left and right sides. It was welded up and under the inner sill and to the side of the transmission tunnel. The OEM style replacement panels are made the same way. It's probably possible to replace the panels along the original seams without cutting the car in two, but it sure wouldn't be fun. Not only is the access inconvenient, but you are faced with cutting and grinding hundreds of spot welds. Finally, you have much tougher job of fitting the panel as the car was in a very real sense built around the floor pan.

The obvious solution is to forego the OEM seams and lap the replacement floor over the rim of the original floor.

On the transmission side it is then necessary to trim the replacement floor panel right at the edge of the horizontal tlip. The easy way to do this is to grind the edge at approximately 45° until the metal thins to the point where it dimples. At this point you can tear it apart with your (gloved) hands.

#36 grit flap disc, as shown mounted on light-duty Makita works fine; heavier-duty angle grinder works well too.

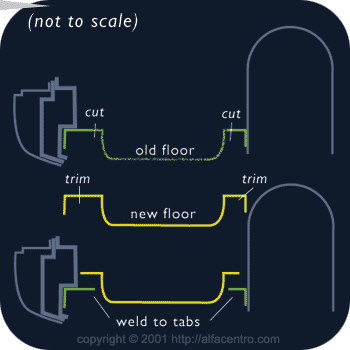
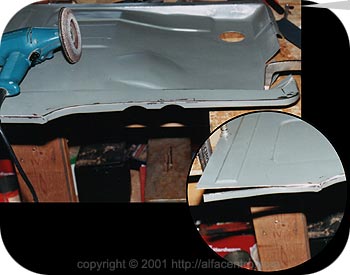
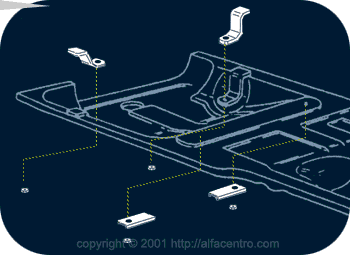
The OEM-style replacement rear floor panels come with the reinforcement for the inboard seat belt mount, but not those for the seats themselves. These must be fabricated out of heavy gauge sheet metal. The forward mounts are of shallow c-section and are attached below the floor, inside the cross-member. The rear seat reinforcements are s-shaped and attach from above, with the nuts below welded directly to the pan.
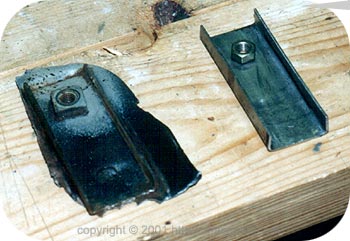
Original forward seat reinforcement on left, fabricated replacement on right. Edges can be bent in vise or with sheet metal brake. Starting out with channel stock is another option.
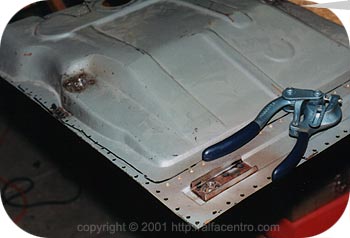
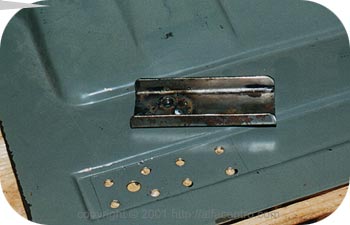
Getting ready to weld a reinforcement to the pan. Rosette welding it from above will mimic the original spot welds.
Punching 3/16" holes around the perimeter for rosette welding. Perimeter was marked with black marker while the pan was clamped in place, working from below. Roper-Whitney hand punch makes short work of the job.

Front and rear reinforcements are in place in this photo.

Continued... p8 p9 p10 p11 p12 p13 p14

back to part 1

Questions? Comments?

Copyright © 2001 AlfaCentro & Forza Modern Media. All rights reserved. Neither AlfaCentro.com, it's publisher, FORZA Modern Media, LLC., or the individual article authors makes any warranties, expressed or implied, that the techniques, modifications, and procedures outlined in these stories are free of errors and omissions, meet applicable safety standards, or are suitable for the purposes described. The publisher and authors also expressly disclaim all liability for damages that may arise from the use of information presented in these articles.

alfacentrofeaturestech q&aresourcesclassifiedsabout usannounce list