| ||||||
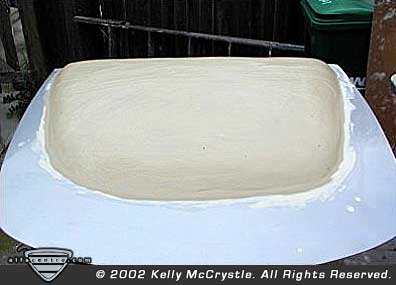
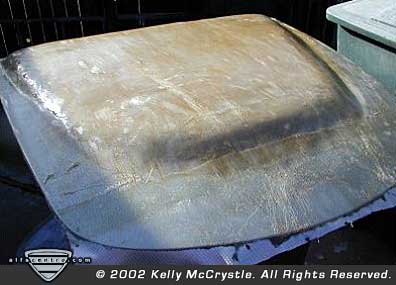
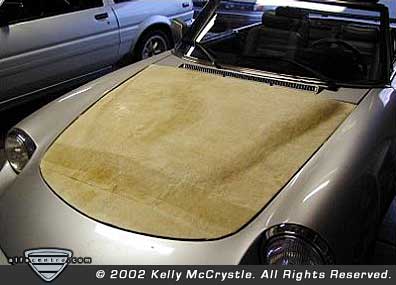
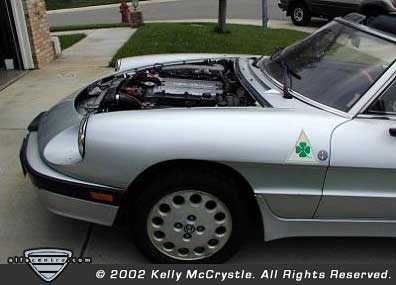
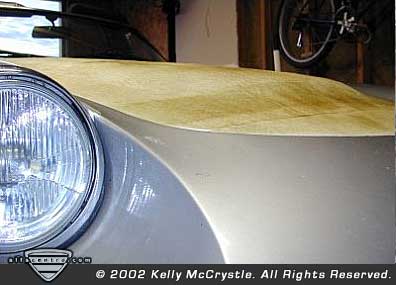
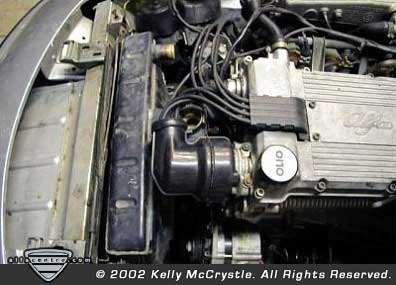
| HEATER HOSE CONNECTIONS There is a port on the back of the intake manifold to connect the water inlet to the heater core, the water outlet from the heater core should be connected to the intake at the throttle body. You will then need to go to Home Depot and find brass fittings to expand the water outlet from the throttle body to the size of the inlet on the water pump. These connections will become obvious when you see them. HOOD CLEARANCE You will have some hood clearance issues after you have installed the TS engine. The TS engine is about 1” taller than the 2.0L engine that you removed, thus this necessitates the fabrication of a new hood for proper clearance. I looked into lowering the engine into the engine-compartment, but this was short lived as there is very little clearance between the pan and the cross-member. Without performing major surgery to the pan and fabricating new motor mounts the engine is just too tall. I fabricated a fiberglass hood using the original hood as a mold. I obtained a bag of fire clay from my local masonry supply yard. The fireclay was added to the hood and carved to form a raised area on the stock hood where I was in need of clearance, the clay was covered with plastic wrap. I laid fiberglass cloth over the hood and saturated it with resin. I continued to build up more layers of fiberglass, reinforcement mat and resin to form the hood. Instead of going through the trouble of fabricating an inner support structure for the hood, I chose to install my hood using pins and clips. I am looking for a metal bender who could modify the metal hood to gain the proper clearance so I can go back to the hinged hood assembly. | ||||||
| ||||||

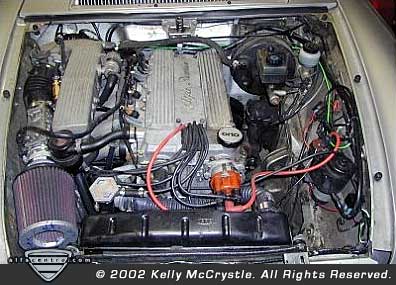
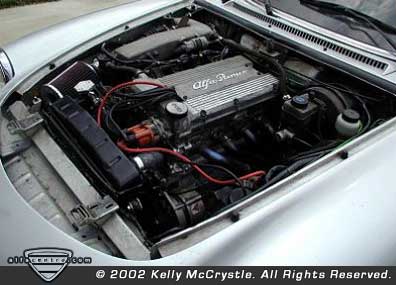
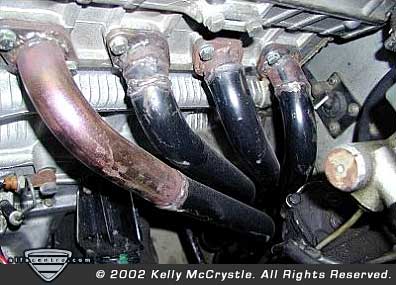
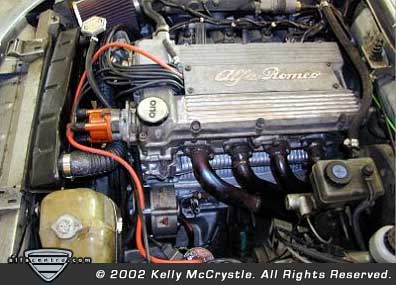
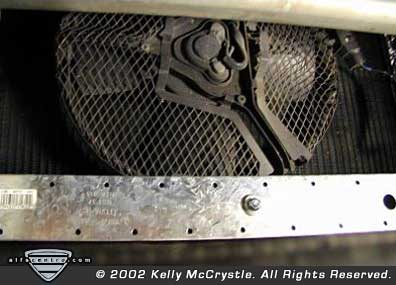
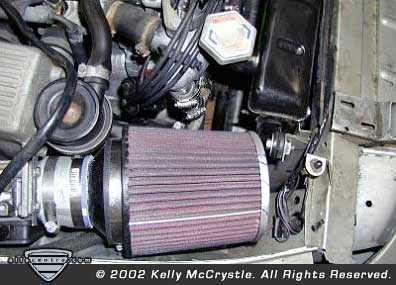
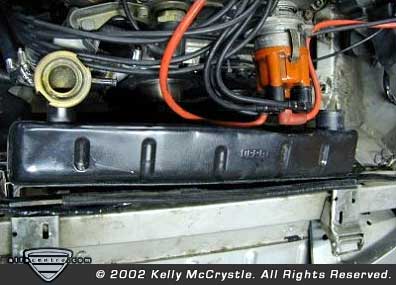
| EXHAUST MANIFOLD A stock manifold is not available to fit the TS engine when mounted in a Spider. The spacing of the TS exhaust ports is similar to that of the 2.0L engine, though the head has vertical surfaces instead of angled surfaces for the exhaust manifold. I chose to reconfigure an IAP tubular header to fit onto the TS engine. In doing so, I first sourced some new flanges from a local muffler shop. I then started with a standard 2.0L IAP header which comes disassembled in three piece. The first piece being the cylinder 1-4 down pipes, the cylinder 2-3 in a second piece and then a 2-1 collector with an 02 sensor fitting. I cut the flanges off of the 1-4 piece, flared the tubes, bolted the new flanges to the head and then cut short pieces of tubing to span the distance between the head and the header. I then welded as much as I could while the flange was still bolted to the head. It is important at this point to work slowly and do not weld too much at a time or else you will distort the flange. The cylinder 2-3 piece was cut and welded in the same manner. In the future I plan on reconstructing the entire header using mandrel bent Stainless Steel tubes and I am contemplating having a small production run made, please let me know if there would be interest in such a product. Note: that the IAP header is not an equal-length header so I am giving up some power here. Stay tuned for further enhancements as I have a T04 turbo sitting in the corner of the garage for future use… RADIATOR FAN I chose not to use the stock crank-driven fan and instead have wired up an electric pusher fan. I sourced my fan from the local pick-n-pull yard off of a Toyota, though any electric fan with the correct dimensions will work. I have wired my fan to a relay and switch within the cabin so that I may turn it on and off as needed. I may switch to a temperature-controlled relay in addition to the on-off switch. | ||||||
| ||||||
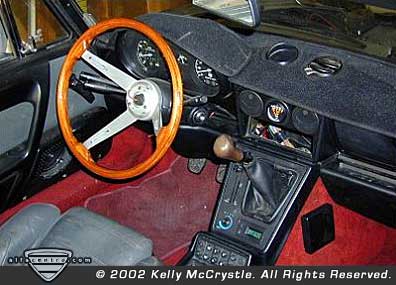
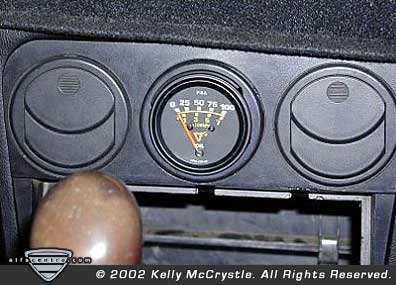
| OIL GAUGE I finally had it with the stock gauge when it wouldn’t register any reading, even with a new sensor, so I picked up a simple mechanical oil pressure gauge. I installed the gauge in the center A/C outlet above the radio, as they are no longer needed due to the deletion of the A/C. I plan to add a new water temp gauge and an air/fuel mixture gauge on either side of the oil pressure gauge. | ||||||
| ||||||

| CONTACT THE AUTHOR: If you are interested in purchasing the components necessary for this swap, such as engines, exhaust manifolds, hoods and other pieces please contact me, as I am contemplating offering conversion parts in the future (Off-Road Use Only). Additional Information: Appendix A - Fuel Quality Relay Information & Motronic Self-diagnostic codes Appendix B - Wiring Harness Info Appendix C - Setting Up the Twinspark Distributors EDITOR'S NOTE: | |||||||||
| |||||||||

| Neither AlfaCentro.com, it's publisher, FORZA Modern Media, LLC., or the individual article authors makes any warranties, expressed or implied, that the techniques, modifications, and procedures outlined in these stories are free of errors and omissions, meet applicable safety standards, or are suitable for the purposes described. The publisher and authors also expressly disclaim all liability for damages or injury that may arise from the use of information presented in these articles. |
alfacentro • features • tech q&a • resources • classifieds • about us • announce list