| |||||||||
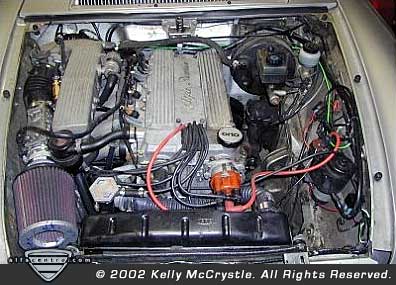
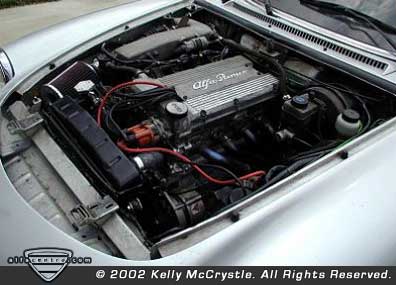
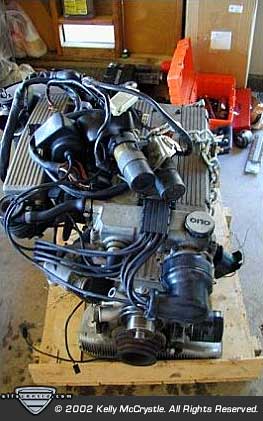
| I was in need of a rebuilt engine for my 1988 Spider Quad. First, I looked into building an Bosch-injected engine with all of the traditional tricks to extract every bit of horsepower but soon discovered that I could easily wind up spending well over $5,000.00 on such a project. I then thought about turbo charging the car. I had already located an old Shankle turbo kit from the 70’s and was assembling the remaining parts for the conversion. As I learned more, I found that I was going to have to switch from Bosch L-Jetronic to a programmable engine management system in order to have a properly set up turbo engine, adding to the cost and complexity of the project. As most of the Alfa community knows there is a perfectly good factory engine that already produces more HP than the stock 2.0 liter that was available in the United States - the 8-valve TwinSpark Engine. This engine, which was common in other parts of the world but never available in the US, would provide the perfect enhancement to my Spider. The 8-valve Twinspark engine should not be confused with the later 16-valve TwinSpark engine, as the 16-valve engine is a different animal and cannot be utilized for this swap. 8 VALVE TWINSPARK ENGINE | |||||||||
| |||||||||


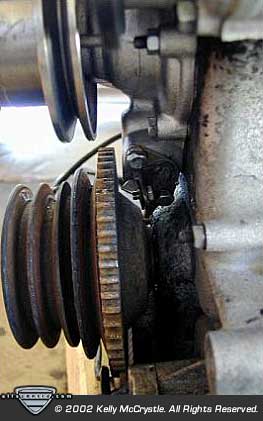
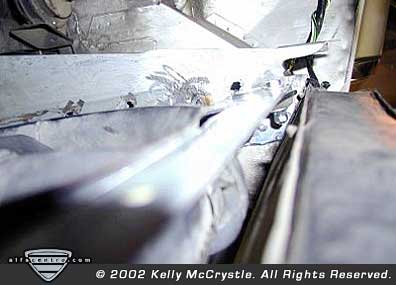
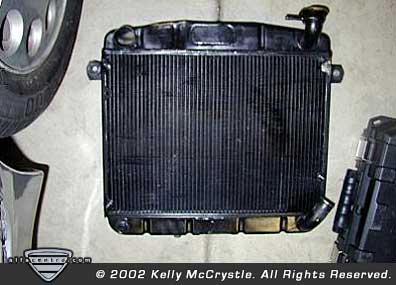
| PREPARING THE CAR FOR SWAP You will need to remove the engine/transmission from the Spider that you are performing this swap on. This process is well documented in other manuals. After the engine and transmission have been removed from the car, you will need to remove the existing engine management wiring harnesses. I will at this point assume that you are working on a Bosch injected Spider, as that is what I performed the swap on. In order to remove the wiring harness and all of its components it is very helpful to remove the interior from the passenger side of the Spider. While I was removing the interior I went a little further and removed the air conditioning from the passenger compartment, as a Spider doesn’t need AC in my opinion. Pull back the carpet along the passenger side to reveal the wiring harness. Remove the two ECU’s and the Altitude compensation device from behind the passenger seat. There should be a thick red wire coming from the battery to the main relay in the ECU harness, cut this wire and leave it there. Go to the engine compartment, remove the grommets surrounding the wiring harness on the passenger side of the car, and carefully work the wiring harness through the hole in the firewall and discard when done. Save all the parts you remove such as the ECU’s, AFM, fuel injectors, etc. I have had very good luck from selling these parts on E-BAY. Now that you have removed the old wiring from the car it is time to perform some modifications to the radiator support to gain clearance between the radiator and the camshaft driven distributor. Remove the support brackets from within the nose of the car. These brackets are held in place with spot welds. I used a cold chisel and a BFH to remove them. Weld any tears in the sheet metal and save the brackets for reinstallation later. You will then need to form a slot behind the upper radiator support mount in order to move the top of the radiator closer to the front of the car. See the photos below for before and after pictures. I used a die-grinder to create the slot in the sheet metal. The bolt to affix the radiator is then run from the front of the car towards the engine bay to affix the radiator. Now take the two support brackets that were removed above and a welder’s magnet and position them so that they are resting against the radiator as they originally were. Weld in place along the edges. You will also need to take your radiator into a repair shop to have it modified. Below are pictures of my modified radiator. I had the filler neck removed and filled, the old fluid inlet was utilized as the new filler neck and a new fluid inlet was placed on the side opposite the original filler neck. This is also a good time to have the radiator rodded and cleaned. | ||||||
| ||||||

| Neither AlfaCentro.com, it's publisher, FORZA Modern Media, LLC., or the individual article authors makes any warranties, expressed or implied, that the techniques, modifications, and procedures outlined in these stories are free of errors and omissions, meet applicable safety standards, or are suitable for the purposes described. The publisher and authors also expressly disclaim all liability for damages or injury that may arise from the use of information presented in these articles. |
alfacentro • features • tech q&a • resources • classifieds • about us • announce list